Hey there, if you’re reading this, you’ve probably just unboxed a radiator fin forming machine (or are about to) and are low-key stressing about how to get it up and running without messing up the whole setup—trust me, I’ve been there. I’m [insert your company role, e.g., the lead tech at the radiator fin forming machine supplier], and over the last 12 years of selling these things, I’ve walked more shop owners, fabricators, and even one tiny startup that built solar panel radiator backs through this process than I can count. The good news? It’s not rocket science… but skip a step, and you’ll end up with a machine that either won’t turn on, cranks out wonky fins, or even damages the material you’re feeding it. Let’s break this down step-by-step, no jargon, just real-world tips I wish someone had told me when I started. Radiator Fin Forming Machine
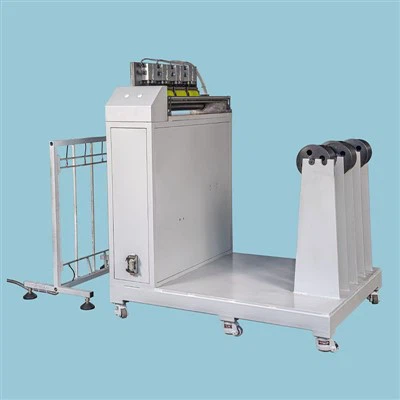
First, before you even grab a wrench or untape the machine’s wood crating (yes, some suppliers still wrap these in wood to keep them safe during shipping—we do, at my place), let’s get the pre-install checks out of the way. I see so many people skip this part and then wonder why half their parts are missing or the machine arrived with a dented side that throws the alignment off. Here’s what you need to do:
-
Inspect the shipping crate immediately when it arrives. Don’t wait until your maintenance crew has time—cut the straps, slide the crate off the pallet, and check every side, top, and bottom for damage. If there’s a big dent on the base, or a corner that looks like it got banged up on a truck, snap a bunch of photos right away. I can’t tell you how many people come to us a week later saying “my machine is broken” and we realize they skipped the initial check—shipping damage isn’t our fault if you don’t report it within 48 hours of delivery, so don’t slack here. Also, check the packing list: we include everything you need (spare drive belts, hex keys, a small multimeter, the operation manual printed right there, and even a tiny bottle of lubricant for the rollers) but sometimes forklift drivers toss extra stuff by accident. If something’s missing, hit us up fast—no sense waiting.
-
Clear a proper space for it. Radiator fin forming machines are big—like, 6 to 10 feet long, 3 to 4 feet wide, and 4 to 5 feet tall, depending on the model (we have 3 sizes, for thin aluminum fins used in cars up to thicker copper fins for HVAC). You need at least 2 feet of space on all sides to feed in the raw material (aluminum or copper coil, usually 12 to 24 inches wide) and pull out the finished fins, plus room for someone to stand and adjust settings. Also, make sure the floor is level—like, really level. I had a guy once set his machine on a slightly sloped concrete floor in his shop, and within a month, the rollers were wearing unevenly, making fins with wavy edges. Most shops have a level spot, but if yours doesn’t, you can use shims (not wood—metal shims, they’re sturdier) under the machine’s base to adjust. No sloped floors, okay?
-
Plan your power and air supply. This is another common mistake. Most of our standard models run on 220V single-phase, but if you’re using our heavy-duty industrial ones, they need 480V three-phase. Don’t just plug it into whatever outlet is nearby—check the back of the machine (there’s a sticker that says power requirements) and make sure your electrical setup can handle it. If you’re not an electrician, call one in—burning out the machine’s motor is way more expensive than a quick check. Also, if your machine has pneumatic rollers (a lot of the newer ones do, for better pressure on the material), you need an air compressor that can put out at least 80 PSI and has a 10-gallon tank. If your compressor is smaller, you’ll get delays, or the rollers won’t clamp down right, leading to fins that come loose.
Okay, pre-install is done—now the actual setup. Let’s start with getting the machine off the pallet. You can’t just drag it, obviously; it’s heavy (most are 800 to 1,500 pounds). If you have a forklift, use the two fork pockets on the bottom of the base—slip the forks in, lift straight up, and slide it into place. If you don’t have a forklift, most people rent a skid steer or use a come-along (the winch type) mounted to the ceiling of your shop. Pro tip: have two people guide it when moving, so you don’t bang it into any walls or other equipment. Once it’s in the exact spot, take the level you should have handy (we tell everyone to grab a small spirit level before delivery) and set it on the machine’s base and on the top roller shaft. Adjust the shims until the bubble is dead center—this is non-negotiable. A level machine is a happy machine.
Next, connecting the power and air supply. This is where I stress not being a hero. If you’ve worked with electrical stuff before, fine, but if you’re even a little unsure, call an electrician. The power cord we send is only 6 feet long, so you’ll need an extension cord rated for at least 10 gauge (don’t use that flimsy 16-gauge one you have for your shop vac—too thin, it’ll cause voltage drops). The air line? Use a ½-inch nylon or rubber line, not the cheap ¼-inch stuff—small lines cause pressure loss, which we talked about earlier. Once you connect both, turn the air compressor on first, then flip the machine’s power switch (it’s on the control panel, front right side) to the “on” position. Wait 30 seconds, then press the “test run” button—this will spin the rollers slowly for 5 seconds so you can check alignment. If the rollers make a weird grinding noise, or you see them wobble, turn it off immediately—you’ll need to adjust the roller tension (the hex keys we sent are for this) before moving on.
Now, the part that makes or breaks your fins: the feed and alignment of the raw material. Most people skip this and just feed the coil straight in, but that’s a bad call. First, unroll a few feet of your aluminum or copper coil (make sure it’s sitting on a coil stand that’s the same height as the machine’s feed side—if it’s too high or too low, it’ll bend the material or jam the rollers). Cut the last little part of the coil that’s uneven (the part that was wrapped around the spool) so you have a straight, flat edge to feed into the rollers. Now, slowly feed that edge between the top and bottom rollers—don’t push too hard, let the machine pull it in on its own. If it’s not pulling, check the air pressure—maybe it’s too low, or the roller tension is too loose. Once the material is 2 feet into the machine, stop, and take a look at the fins’ guide edges (the little metal strips that keep the material from drifting left or right). Adjust those guides until they’re just barely touching the sides of the material—if they’re too tight, they’ll scratch the metal, if they’re too loose, the material will shift and make lopsided fins.
Wait, let’s pause here—what about controls setup? The control panel is simple, right? We program the standard settings for common fin lengths (2 inches, 4 inches, 6 inches) but if you need a custom length, it’s easy to adjust. Let’s say you want 5-inch fins: press the “length” button, use the up/down arrows to get to 5.0, then press “enter”. For the fin profile (the little ridges that make the fin rigid), most of our models have 3 standard profiles—flat, single ridge, double ridge—select whatever your application needs. If you’re unsure, check the manual or send us a message—we reply fast, no waiting 3 days for support. One thing I warn about: don’t adjust the motor speed too high when you first start. Run it on 50% speed for the first 100 feet of material, then bump it up to 75%—this lets the rollers break in a little, and helps you catch any jams before they cause damage.
Now, testing and fine-tuning. This is the step I spend the most time on with customers, because no two materials are exactly the same. Take a scrap piece of the same material you’ll be using for production—don’t use the good stuff yet. Feed it through, collect a 10-foot piece, and check it: are the fins’ edges straight? No bends, no scratches? Are the ridges even along the whole length? If the ridges are uneven, you probably need to adjust the roller pressure—use the hex keys to tighten or loosen the top roller’s tension a little (quarter turns at a time, not full turns). If there’s a scratch, the guide strips are too tight, or the roller has a piece of debris on it (wipe the rollers down with a clean cloth every week, by the way—debris builds up and scratches metal). Another thing: if the machine jams mid-run, don’t just yank the material out. Turn the power off first, use the reverse button to pull the material back out slowly, then check for any stuck pieces. Jams happen, even with good setup—just don’t panic, and always turn the power off before digging in.
Once you’ve tested the scrap and everything looks good, you’re ready for production. But wait, a few quick maintenance tips to keep your machine running for years. Every day after use: turn it off, wipe down the rollers and control panel, and remove any scrap material from around the feed and output sides. Every week: check the drive belt (the one that spins the rollers) for cracks—if it’s frayed, swap it out with the spare we sent, don’t wait until it breaks mid-production. Every month: check the floor level again—sometimes, when you feed heavy material, the machine can shift a tiny bit, so a quick level check keeps things aligned.
Now, let’s be real—things don’t always go perfectly. If you run into a problem: machine won’t turn on? Check the power cord connection first, then the circuit breaker. Fins are too thin or too thick? Adjust the roller gap (there’s a scale on the side of the machine, so you don’t have to guess). Material keeps jamming? Check the coil stand height. And if none of that works? Don’t waste an hour troubleshooting—hit us up. We have a team of techs available 6 days a week, and most issues can be fixed over a quick video call in 10 minutes. No leaving you hanging with a broken machine and deadlines looming.
At the end of the day, installing a radiator fin forming machine isn’t about being a pro—it’s about taking your time, not skipping the small steps, and having a plan before you start. I’ve seen guys rush through the setup, skip the level check, and end up with a machine that’s useless for 3 weeks, losing way more money than the time they saved cutting corners. If you do the pre-install checks, get the right power and air, align the material properly, and test with scrap first, you’ll be cranking out perfect fins in no time.
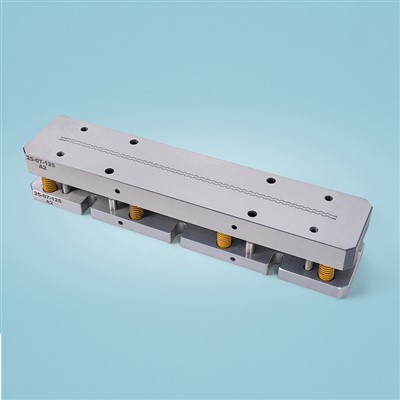
If you’re just getting started, or already have a machine that’s been giving you trouble, we’re here to help. Whether you need a hand picking the right size machine for your production volume, troubleshooting that random jam, or ordering spare parts, just reach out. No pushy sales calls, no hidden fees—just real support for people who need to get their work done. Don’t let a bad setup slow you down; let’s get your machine running smoothly.
Stamping Die References
- Industrial Radiator Components Association. (2022). Guidelines for Installation and Maintenance of Metal Forming Equipment.
- Occupational Safety and Health Administration (OSHA). (2021). Safety Standards for Heavy Machinery Setup in Manufacturing Facilities.
- The Fabricator Magazine. (2023). Common Mistakes in Setting Up Roll Forming Machines (Including Radiator Fin Models).
Suichang Lvye Machinery Co., Ltd.
We are one of the most professional radiator fin forming machine manufacturers in China, also support customized service with low price. We warmly welcome you to buy discount radiator fin forming machine for sale here from our factory. If you have any enquiry about quotation, please feel free to email us.
Address: No. 402, Mudanting East Road, Miaogao Street, Suichang County, Lishui City, Zhejiang Province
E-mail: L528753@outlook.com
WebSite: https://www.suichanglvye.com/
